Polymer Clay Christmas Ornaments from Simple Cutters
Flat clay ornaments cut from one slab, with a clean punched hanging hole and pressed-in decoration. A simple seasonal project for decorative use only.

Tutorial at a glance
Materials
- Polymer clay in two or three colors
- Acrylic roller
- Two depth guides of equal thickness
- Smooth ceramic tile
- Simple cutters such as a tree, star and circle
- Drinking straw or small tube
- Ball stylus
- Needle tool
- Thin cord, ribbon or twine
- Fine wet-and-dry sandpaper (optional)
A few cutters and a rolled slab are all it takes to make polymer clay Christmas ornaments that look finished and hang well. Flat ornaments are a good first seasonal project: the shapes are simple, the decoration is pressed in instead of sculpted, and one slab of clay yields several pieces at once.
The details that decide whether an ornament works are practical ones. It has to be thick enough not to snap, the hanging hole has to be clean and far enough from the edge, and the back has to be flat. Get those right and the decorating is the easy part.
These ornaments are decorative only. They are meant to be looked at, not played with, and they should hang where they will stay cool, which is covered near the end.
What You Need
- Polymer clay in two or three colors
- An acrylic roller and two depth guides of equal thickness
- A smooth ceramic tile
- Simple cutters: a tree, a star, a circle, or any plain festive outline
- A drinking straw or small tube for the hanging hole
- A ball stylus and a needle tool
- Thin cord, ribbon or twine
- Fine wet-and-dry sandpaper (optional)
No cutter in the shape you want? Draw a plain outline on card, cut it out, and trace around it with a tissue blade or needle tool. Keep to generic shapes such as trees, stars, mittens and baubles.
Roll the Slab
Condition the clay, then roll it on the tile between the depth guides to about 3/16 inch (5 mm). That is noticeably thicker than a slab for earrings. An ornament hangs from one small bridge of clay above its hole and gets knocked about when the tree is decorated and packed away, so thin ones break at the top.
Burnish the slab lightly to the tile and let it rest until it has cooled from the warmth of your hands. Cool, firm clay releases from the cutter cleanly.
Cut, Punch and Decorate
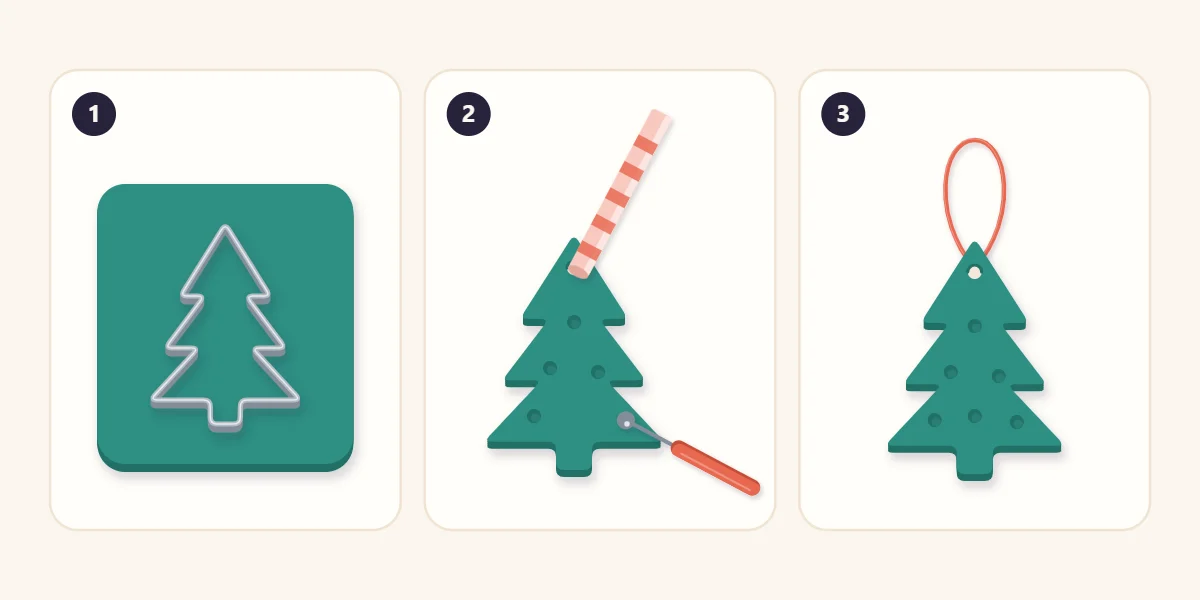
- Cut the shapes. Press the cutter straight down to the tile, give it a very small wiggle, and lift. Fit as many shapes onto the slab as you can, then peel away the scrap and leave the shapes where they are. There is more detail in the guide to using cutters for clean shapes.
- Punch the hanging hole. Push the straw straight down near the top of the shape, twist slightly, and lift it out with the plug of clay inside. Leave at least 1/4 inch (6 mm) of clay between the hole and the edge. A hole closer than that leaves a weak bridge.
- Place the hole on the center line. An off-center hole makes the ornament hang crooked. On a tree it goes just below the tip; on a star, in the top point where the clay is widest.
- Add pressed decoration. Press the ball stylus into the surface to make dots like baubles on a tree. Use the needle tool laid on its side to press straight lines, or the end of the straw to stamp small rings.
- Add color if you like. Roll tiny balls of a second color, set them on the surface and press each one flat with the stylus so it bonds to the slab.
- Tidy the edges. Run a fingertip around the top edge of each shape and smooth any frill at the base with the side of the stylus.
Tip
Punch the hole before decorating, not after. The straw distorts the clay slightly around it, and it is easier to plan a pattern around a hole than to repair a pattern the hole has pushed out of place.
Decoration Ideas for Simple Shapes
| Shape | Decoration | Tool |
|---|---|---|
| Tree | Scattered dots, or rows of short horizontal lines | Ball stylus, needle tool |
| Star | A line from the center to each point | Needle tool laid flat |
| Round | Lines crossing at the center with short side strokes, like a snowflake | Needle tool, stylus for the tips |
| Mitten | A band of stripes at the cuff | Thin clay strips pressed in |
| Bauble | Stripes or a band of dots across the middle | Thin clay ropes, stylus |
Fabric, lace and other household items also make good all-over patterns when pressed into the slab before cutting. The article on texture techniques using everyday tools has more options.
Cure the Ornaments
Cure the ornaments flat on the tile they were cut on, so they are never lifted while soft. Every manufacturer sets its own curing requirements, and they differ between product lines, so follow the instructions printed on the packaging of the clay you are using. Thicker pieces like these deserve particular care on that point, since under-cured clay tends to be brittle and an ornament that snaps at the hole is usually one that was not cured through.
A separate oven thermometer, a loose foil tent over the tile and a ventilated room are all sensible habits; the guide on how to cure polymer clay explains each of them. Let the ornaments cool completely on the tile before moving them.
Finish and Hang
Once cool, check the edges and the inside of each hole. Any roughness can be removed with fine wet-and-dry paper used wet. You can leave the surface bare, which gives a soft matte look, or add a coating. Coatings vary in how they behave on different clays, so read the label and test on a cured scrap first; the overview of matte, satin and gloss finishes walks through the options.
To hang an ornament, cut a length of cord about 8 inches (20 cm) long, fold it in half, and push the folded end through the hole from the front. Pass the two loose ends through the loop and pull snug, then knot the loose ends together. This holds the ornament facing forward instead of letting it spin sideways.
Where to Hang Them
Watch out
Hang clay ornaments away from heat sources. Keep them clear of lights that get hot, candles, fireplaces, stoves and radiators, and do not let them rest against a bulb.
Treat the finished pieces as decorations only. Small ornaments and their cords should be hung out of reach of young children and pets, and children who help make them should be supervised throughout, with an adult handling the oven.
After the holidays, wrap each ornament in tissue paper and store them flat in a box, with nothing heavy on top. Stored that way, in a cool place, the set will be ready to hang again next year.
Frequently asked questions
How thick should polymer clay ornaments be?
Roll them thicker than you would for jewelry, about 3/16 inch (5 mm). The whole ornament hangs from the small bridge of clay above the hole, and thin ornaments tend to break there when they are handled or stored.
How do I make a neat hanging hole?
Push a drinking straw straight down through the uncured clay, twist slightly and lift it out with the plug inside. Keep the hole on the center line and at least 1/4 inch (6 mm) from the edge so the clay above it is strong enough.
Where should clay ornaments be hung?
Treat them as decorative pieces and hang them away from heat sources such as lights that get hot, candles, fireplaces and radiators. Keep them and their cords out of reach of young children and pets.