How to Make a Polymer Clay Wall Hanging
Cut flat clay shapes from a slab, plan the strands on paper, and link them with jump rings under a wooden dowel. The layout stage is what makes the finished piece hang straight.
Tutorial at a glance
Materials
- Polymer clay in three or four colors
- Acrylic roller and two depth guides
- Ceramic tile
- Simple shape cutters or a tissue blade and paper templates
- Needle tool
- Jump rings, about 8 to 10 mm
- Two pairs of flat-nose pliers
- Wooden dowel, about 8 in (20 cm) long
- Cord or twine
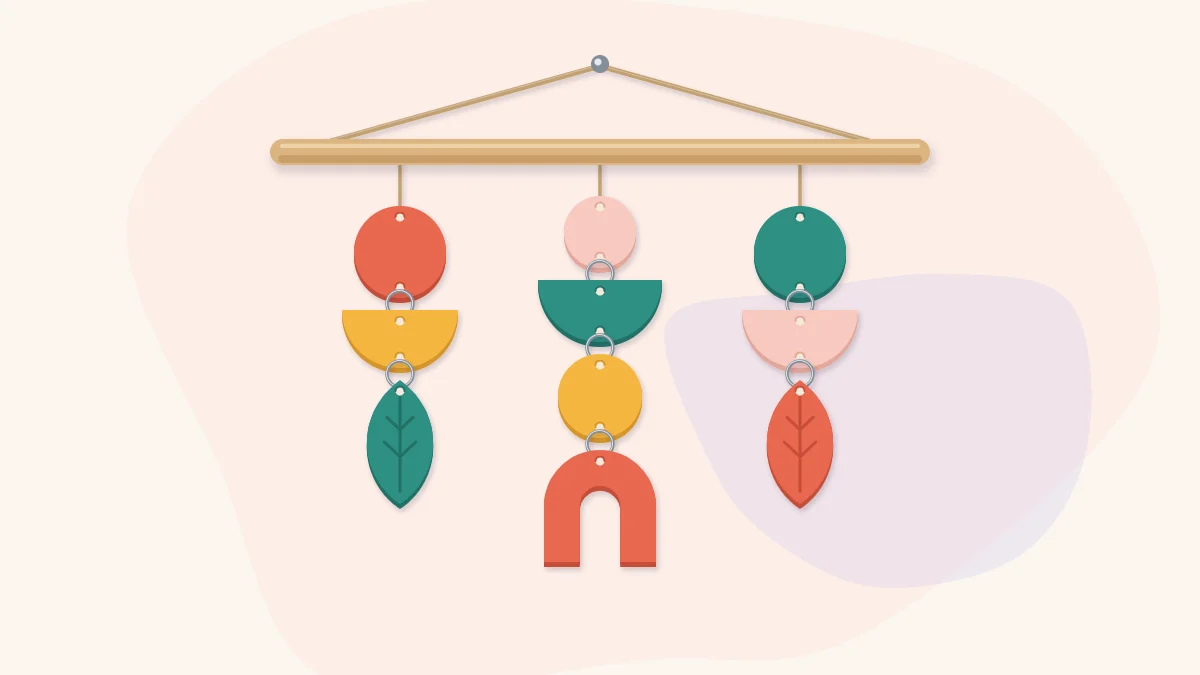
A polymer clay wall hanging is a set of flat clay shapes linked into strands and hung from a dowel. It looks intricate on the wall, but every part of it is a beginner skill: roll a slab, cut shapes, pierce holes, cure, and join the pieces with rings.
What decides whether the piece hangs well is planning. Holes that sit off-center make shapes tilt, and strands of very different weight pull the dowel crooked.
The version described here uses three strands of four or five shapes each on a dowel about 8 inches (20 cm) long. To resize it, change the number of strands or shapes, not the clay thickness or hole size.
What you need
- Polymer clay in three or four colors, about two standard small blocks in total
- Acrylic roller and two depth guides of equal thickness, such as craft sticks or strips of thick card
- A ceramic tile to work and cure on
- Cutters in simple shapes (circle, arch, leaf), or a tissue blade and paper templates
- Needle tool for piercing holes
- Jump rings, about 8 to 10 mm across, and two pairs of flat-nose pliers
- A wooden dowel about 8 inches (20 cm) long, plus cord or twine
- Paper and a pencil for the layout
Choose shapes that suit their place in the strand
Stick to flat, simple outlines. Each piece needs a hole at the top and, unless it is the last piece, another at the bottom directly below it, so a shape with nowhere sensible for a bottom hole belongs at the end of a strand.
| Shape | Best position | Where the holes go |
|---|---|---|
| Circle | Anywhere | Top and bottom, on the same vertical line |
| Half-moon | Top or middle | Center of the straight edge and the lowest point of the curve |
| Arch | End of a strand | One hole at the top of the curve; the open legs have no center point below |
| Leaf or teardrop | End of a strand | One hole at the wide or rounded end, so the point hangs down |
For color, repeat each color at least once in every strand, in a different position each time.
Roll the slab and cut the shapes
- Condition the clay. Work each color until it is soft and bends without cracking; the guide toconditioning polymer clay shows what ready clay looks like.
- Roll an even slab. Place the clay on the tile between the two depth guides and roll until the roller rides on the guides. Aim for a slab about 1/8 inch (3 mm) thick. Thinner pieces can snap at the holes, and thicker ones add weight that every ring above has to carry.
- Cut on the tile. Press each cutter straight down, lift it, and peel the scrap away from around the shape instead of lifting the shape itself. Moving a soft shape stretches it.
- Tidy the edges. Run a fingertip lightly around each edge to soften the sharp corner the cutter leaves. The article on using clay cutters for clean shapes covers stuck clay and ragged edges in more detail.
Cut one or two spare shapes in each color in case a piece is damaged later. Any clay left over can go toward a small project such as a cone ring holder with a dish.
Plan the layout and the hole positions
Before piercing anything, decide where every piece goes. Draw three vertical lines on paper, spaced as the strands will hang on the dowel, and sketch the shapes onto them or arrange paper templates; pieces firm enough to slide with the blade can be lined up in three columns.
Check three things at this stage. The strands should be similar in total weight, so do not put all the large shapes in one column. Neighboring strands should not have their widest shapes at the same height, or they will knock together. And each hole must sit on the center line of its shape, about 1/8 inch (3 mm) in from the edge. Closer than that, the clay around the hole is weak; much farther in, the jump ring will not reach around the edge.
Pierce each hole with the needle tool, twisting as you push, then widen it slightly with a small circular motion. The hole needs to be clearly wider than the wire of your jump rings, since a ring that binds in its hole stops the shape from hanging straight. Lay the open rings between the pieces as a final check that you have enough.

Cure the pieces
Cure (bake) the shapes flat on the tile they were cut on. Curing requirements differ between manufacturers and product lines, so follow the exact instructions supplied with your own clay. A separate oven thermometer is worth using because oven dials can be inaccurate, and a loose foil tent shields thin pieces from direct heat. The full setup is explained in how to cure polymer clay.
Leave the pieces on the tile until they are completely cool, since warm slabs can set with a bend if moved early.
Watch out
Under-cured clay tends to be brittle, and in a wall hanging the weak point is the narrow bridge of clay above each hole. If a spare piece snaps there with light pressure, check your oven with a thermometer and reread the package instructions before curing again.
Assemble the strands
- Open the rings sideways. Hold a jump ring with both pliers and twist one end toward you and the other away. Pulling the ends apart distorts the circle and it will not close neatly. The guide to jump rings and other findings shows the motion.
- Link from the bottom up. Join the last piece of a strand to the one above it, close the ring until the ends meet with no gap, and keep going.
- Attach to the dowel. Tie a short loop of cord through the top hole of each strand and knot it around the dowel, or slide larger rings over the dowel if they fit. Space the strands to match your paper layout.
- Add the hanging cord. Tie a length of cord to both ends of the dowel. A wrap or two of cord on either side of each strand stops it from sliding along the dowel.
Hang it and fix what looks off
Hang the piece from a small nail or hook and look at it from across the room. A dowel that tilts usually means one strand is heavier than the others; swap a large shape for a smaller spare or slide the strands along until it levels. A shape that twists to face sideways generally has a ring that is too small or a hole that is too tight.
Tip
Choose a spot away from doors and walkways where the strands will not be brushed against. Cured shapes can chip if they swing into a hard wall or into each other.
Frequently asked questions
How thick should the clay shapes be for a wall hanging?
A slab of about 1/8 inch (3 mm) is a good starting point. Thinner pieces can snap at the holes, while thicker ones add weight that every ring and shape above has to carry. Rolling between two depth guides keeps all the pieces the same thickness.
Why do my clay shapes hang crooked?
The usual cause is a hole that is not on the center line of the shape, so the piece balances at an angle. A jump ring that is too small or a hole that is too tight can also stop a shape from turning freely. Marking a center line on your paper layout before piercing prevents most of this.
Can the holes be made after curing instead?
Holes can be drilled in cured clay with a small hand drill, but piercing the soft clay is easier and needs no extra tool. If you do drill, support the piece flat on a scrap surface and use light pressure, because the clay near an edge can crack.