Polymer Clay Tools: What You Need and What Can Wait
Four tools handle almost every first polymer clay project. Here is what each one does, what can stand in for it, and which upgrades are worth waiting for.
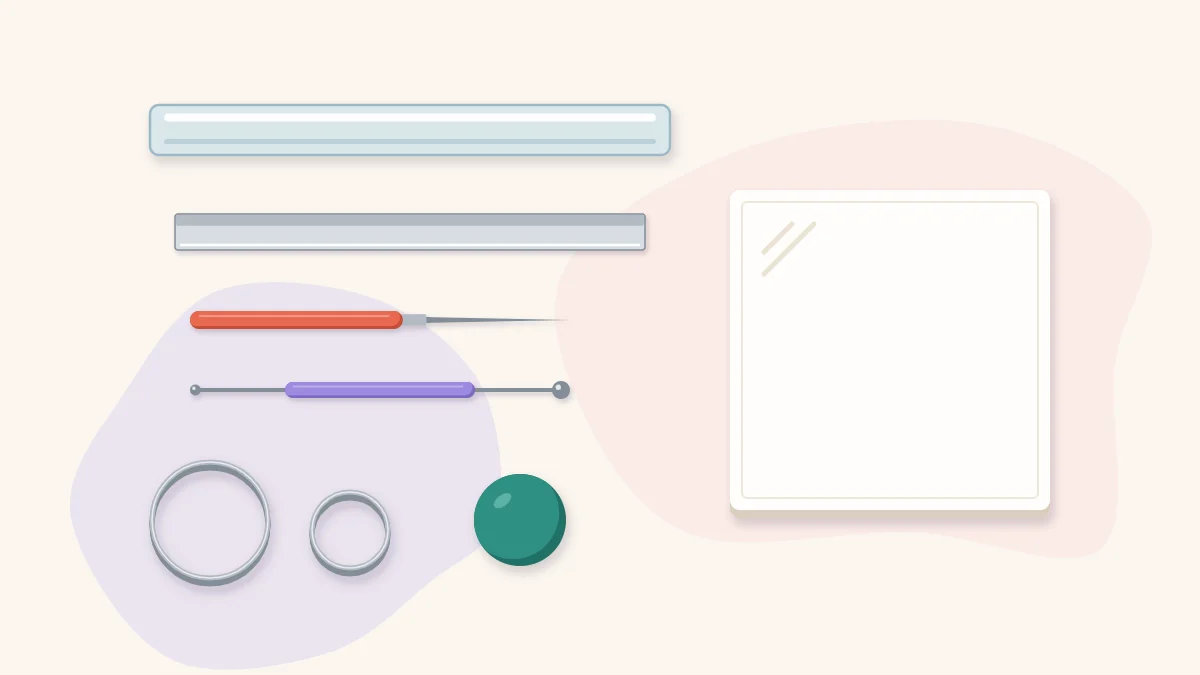
Tutorial at a glance
Materials
- Acrylic roller
- Tissue blade
- Needle tool
- Smooth glazed ceramic tile
- Ball stylus
- One or two round cutters
- Separate oven thermometer
- Aluminum foil and plain copy paper
The list of polymer clay tools sold to beginners is long, and most of it is unnecessary on day one. Four items do nearly all the work in a first project: something to roll with, something to cut with, something to poke with, and a smooth surface that can go from the table into the oven.
Buying only those four has a practical benefit beyond saving space. You learn what each one does with your own hands, and when you eventually add a specialist tool you will know exactly which problem it is solving.
The four essentials
Acrylic roller
A clear acrylic roller flattens clay into sheets and slabs. Acrylic is smooth, does not leave a wood-grain texture, and wipes clean between colors. Choose one long enough to span the slabs you expect to make, around 6 to 8 inches (15 to 20 cm). A roller that is too short leaves ridges where its ends dig in.
Tissue blade
A tissue blade is a long, thin, very sharp strip of steel. It slices blocks, trims slab edges in one straight press, cuts canes without squashing them, and slides under a piece to lift it from the tile. Press straight down rather than sawing. One edge is sharp and the other is not, and they look alike, so mark the blunt edge with a strip of tape or a dab of nail polish and store the blade in a sleeve.
Needle tool
A needle tool is a fine point set in a handle. It pierces holes for jump rings and cords, pops air bubbles, scores lines, and nudges small parts into place where a fingertip would flatten them.
Ceramic tile
A plain glazed ceramic tile is both workbench and curing surface. Clay grips it lightly, which keeps a slab still while you cut. Because the piece stays on the tile from shaping through curing, you never have to peel it up and risk stretching it. The glaze leaves a shiny patch on the underside of the clay, so slip a sheet of plain paper under the piece before curing if you want a matte back.
Small extras that earn their place early
A ball stylus has a small metal sphere at the tip. It presses dimples, shapes petals, smooths seams in tight corners and makes neat dot patterns. A double-ended one with two sizes covers most needs.
A separate oven thermometer is inexpensive and arguably matters more than any shaping tool, because oven dials can be inaccurate and your clay’s instructions depend on the real temperature inside. Add a roll of aluminum foil for tenting and a pack of plain copy paper for lining the tile.
One or two round cutters in different sizes are worth having from the start. Circles are hard to cut freehand, and a circle is the basis of dishes, earrings, magnets and tiles.
Essentials versus tools that can wait
The upgrades below are useful, but each one solves a problem you may not have yet. Wait until a project makes you wish for it.
- Pasta machine. Rolls sheets to a consistent thickness and speeds up conditioning and color blending. It becomes worthwhile once you make slabs regularly. A machine used for clay stays a clay tool and never returns to the kitchen.
- Shaped cutters. Arches, teardrops, leaves and other outlines give repeatable shapes for jewelry and ornaments. Buy them by project rather than by the set. Using clay cutters for clean shapes covers technique.
- Texture sheets. Flexible sheets with a raised pattern that you press into a slab. Household objects do the same job at first, as shown in the guide to texture techniques with everyday tools.
- Small hand drill. A pin vise drills clean holes in cured clay, handy when you forgot to pierce one or want a hole that has not distorted during shaping.

What each tool does and what can stand in for it
| Tool | Main job | Temporary stand-in |
|---|---|---|
| Acrylic roller | Rolling sheets and slabs | A smooth, straight-sided glass jar |
| Tissue blade | Straight cuts, slicing canes, lifting pieces | A craft knife for short cuts |
| Needle tool | Holes, bubbles, fine lines | A toothpick or darning needle |
| Ball stylus | Dimples, dots, smoothing seams | The rounded end of a paintbrush handle |
| Round cutter | Clean circles | A bottle cap or small lid |
| Depth guides | Even slab thickness | Two matching stacks of playing cards |
Any household item you borrow becomes a clay tool for good. Do not return it to food use.
Watch out
Uncured clay can soften or mark some plastics if left in contact with them. Do not store clay resting on plastic tools or rigid plastic boxes unless you have checked that the two get along. Wax paper between clay and container is a simple barrier.
Tools for after curing
Finishing needs its own small set, and none of it is urgent. Wet-and-dry sandpaper in several grades removes fingerprints and levels edges, as explained in how to sand polymer clay. A soft cloth buffs a sanded piece to a low sheen. For jewelry, two pairs of flat-nose pliers open and close jump rings without scratching them.
Glues and varnishes vary widely in how they behave on polymer clay. Check the product label, and test on a cured scrap before using anything on a piece you care about.
Keeping tools in good shape
Wipe the roller, blade and tile with a dry paper towel when you change colors, and with a baby wipe or a little rubbing alcohol on a cloth at the end of a session. Residue left on a roller transfers to the next slab as streaks, most visibly on white.
Blades dull slowly and then start dragging through clay instead of slicing. If cane slices smear or slab edges look torn, the blade is due for replacement. Store it flat in its sleeve so the edge does not nick.
Tip
Before buying a pasta machine, learn to soften clay by hand. Conditioning polymer clay properly teaches you what ready clay feels like, and that judgment carries over to every tool you add later.
Frequently asked questions
Do I need a pasta machine to work with polymer clay?
No. An acrylic roller and two depth guides produce even slabs, and hands alone can condition clay. A pasta machine saves effort once you roll sheets often, and any machine used for clay should never be used for food again.
Can I use kitchen tools for polymer clay?
You can repurpose household items such as a glass jar, a lid or a toothpick, but once an item has touched clay it should stay a clay tool. Keep clay tools and kitchen tools separate.
Why work on a ceramic tile?
Clay grips a glazed tile lightly, so slabs stay still while you cut, and the tile can go into the oven with the piece on it. That means you do not have to lift soft clay and risk stretching it out of shape.