Basic Polymer Clay Shapes: Ball, Log, Teardrop, and Sheet
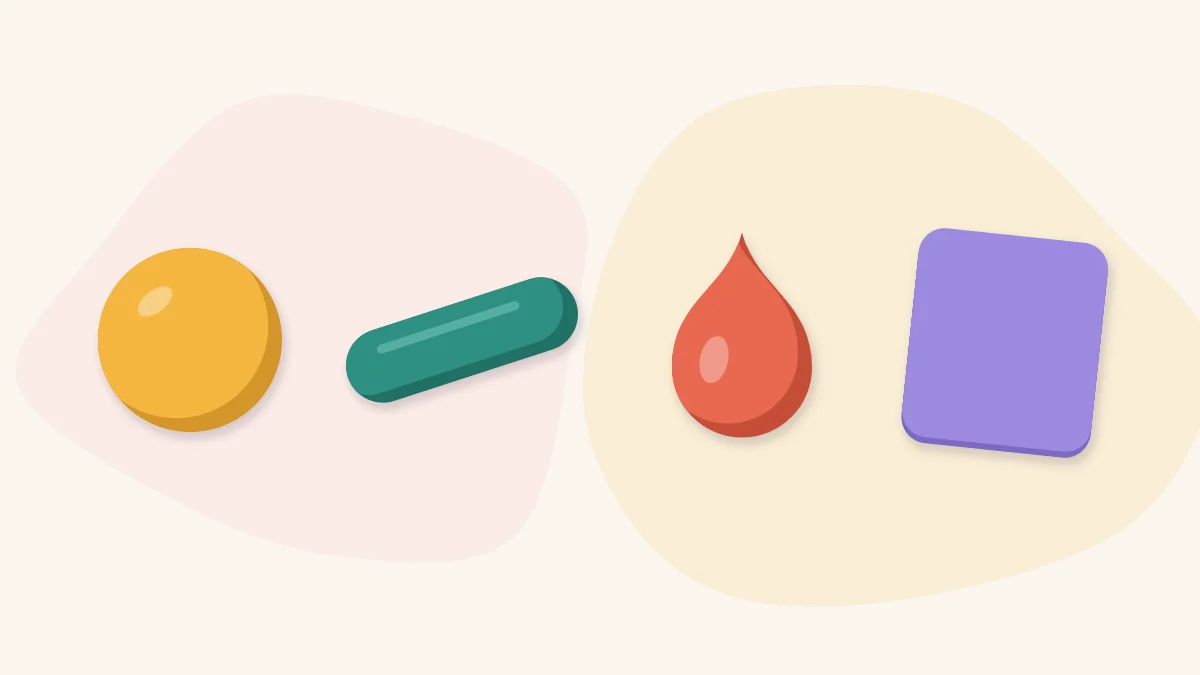
Ball, log, teardrop and sheet are the building blocks of nearly every polymer clay project. Learn to form each one cleanly and see what they turn into.
Tutorial at a glance
Materials
- Conditioned polymer clay
- Tissue blade
- Acrylic roller
- Smooth ceramic tile
- Needle tool
- Ball stylus
- Two matching depth guides, such as stacks of playing cards
Almost everything made in this craft starts as one of four basic polymer clay shapes: a ball, a log, a teardrop or a flat sheet. A bead is a ball with a hole. A leaf is a flattened teardrop. A small animal is a handful of balls and teardrops pressed together. Learn to make these four cleanly and at a consistent size, and most projects stop looking complicated.
The shapes are simple, but clean versions take practice. The usual faults are creases, flat spots, tapered ends and uneven thickness, and each one has a specific cause you can correct.
Before you start
Work with clay that has been properly softened. Stiff clay cracks as you roll it and leaves fold lines that never quite close, so if a ball keeps showing creases, go back and condition the clay a little longer. You need a tissue blade, an acrylic roller, a smooth ceramic tile and clean hands. For practice, cut a block into equal portions so each shape uses the same amount of clay. That makes it obvious when a result is off.
The ball
The ball is the parent of the other shapes, so it deserves the most practice.
- Squeeze the clay into a rough lump and press out any folds or creases with your fingertips. A crease rolled into a ball stays inside as a weak line.
- Place the lump in the center of one palm. Cup the other palm over it.
- Move your hands in small circles with firm pressure at first to round the lump.
- Ease off to very light pressure for the final few circles. This last light pass is what removes flat spots.
If the ball comes out egg-shaped, your circles are too oval or the clay is sitting toward your fingers instead of the hollow of your palm. If it shows a seam, press the seam closed and roll again.
The log
A log, sometimes called a snake or rope, is an even cylinder.
- Start from a smooth ball and roll it back and forth on the tile under your fingers until it becomes a short, thick cylinder.
- Spread your fingers and keep rolling, moving your hands gradually outward from the center toward the ends.
- Use long, light strokes that travel the full width of your fingers. Short, hard strokes leave ridges.
- Trim both ends square with the tissue blade.
A log that is thin in the middle and fat at the ends means you pressed hardest in the center. A log with a flat side stopped rolling and started sliding, usually because the tile or clay is dusty. For a very even log, finish by rolling it under a flat, rigid sheet of acrylic or the side of your roller instead of your fingers.
The teardrop
A teardrop is a ball with one end drawn to a point.
- Roll a smooth ball.
- Hold your palms together in a V, touching at the heels of your hands and open at the fingers.
- Place the ball low in the V and roll it back and forth. The narrow part of the V pinches one side into a taper while the other side stays round.
- Stop when the point is as long and sharp as you need.
A short roll gives a plump drop for petals and animal ears. A longer roll gives a slim cone for leaves, carrots and tails. For tiny teardrops, roll the ball on the tile with one fingertip tilted to the side.
The sheet
A sheet, or slab when it is thicker, is clay rolled to an even thickness.
- Press a ball flat on the tile with the heel of your hand.
- Roll from the center outward with the acrylic roller, lifting and turning the clay a quarter turn between passes so it spreads evenly and does not stick.
- For a consistent thickness, set a depth guide on each side of the clay, such as two matching stacks of playing cards or two craft sticks, and rest the ends of the roller on them.
- Check for air bubbles and pierce any with a needle tool before smoothing over.
Uneven thickness matters more than it seems. Thin areas are fragile, and a piece with thick and thin regions is harder to cure evenly.
Tip
To make matching pieces, measure the clay before shaping it. Roll an even log, cut it into equal lengths with the tissue blade, and roll each length into a ball. Equal segments give equal balls every time.
How the basic shapes combine into other forms
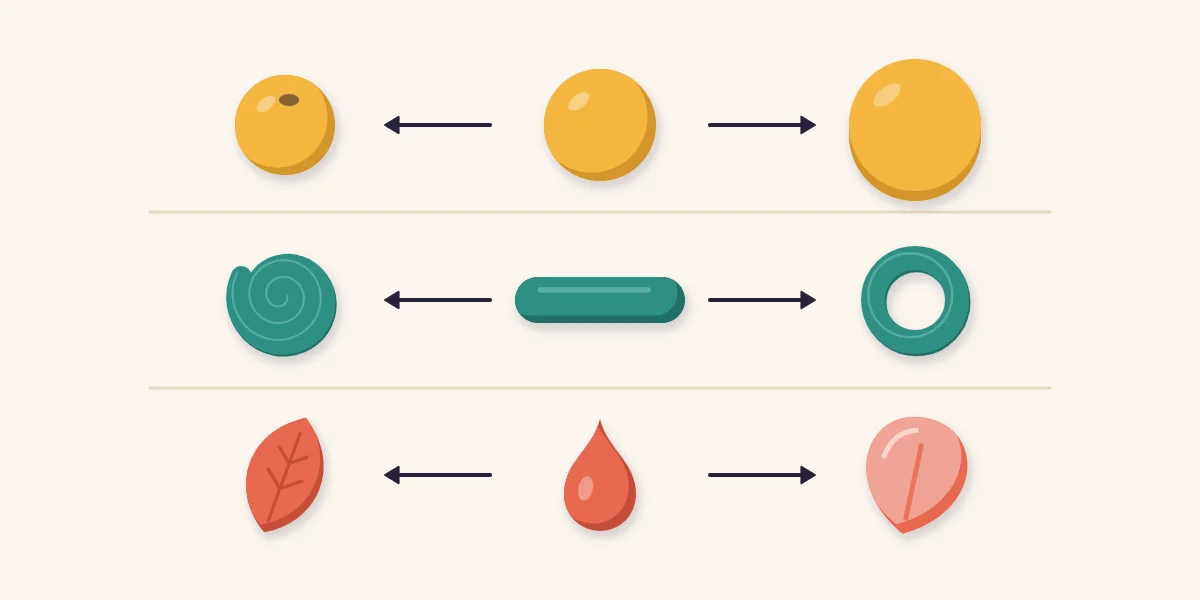
Each basic shape leads to a family of others with one more move.
| Start with | Do this | You get |
|---|---|---|
| Ball | Pierce through the center | Round bead |
| Ball | Press flat on the tile | Disc |
| Log | Wind around itself | Coil |
| Log | Join the two ends | Ring |
| Teardrop | Flatten and score a center vein | Leaf |
| Teardrop | Flatten and thin the wide edge | Petal |
From there the combinations multiply. A row of pierced balls becomes a strand, as described in how to make polymer clay beads. Graded teardrops arranged in rings become the rosette in miniature succulents in tiny pots. Two balls, two teardrops and a tiny cone become a chick in simple miniature animals from basic shapes.
Joining shapes so they stay together
Soft clay sticks to soft clay, but a light touch is not enough for a lasting join. Press the parts together firmly, then blend a little clay across the seam with a ball stylus or the side of a needle tool wherever the seam will not show. On tiny parts, a small dab of liquid polymer clay between the surfaces helps them bond during curing. Products vary, so check the label and test on a scrap.
Watch out
Warm hands soften small shapes quickly, and a soft teardrop loses its point the moment you pick it up. If details are smearing, set the pieces down on the tile and let them rest and firm up before you assemble them.
A short practice routine
Cut a log into eight equal segments. Roll all eight into balls and line them up to compare. Turn two into logs of the same length, two into teardrops with matching points, and flatten two into discs of the same width. Leave two as balls. Squash everything, condition it briefly, and repeat with a different color. Matching sizes by eye is the skill being trained here, and it improves faster than most people expect.
Frequently asked questions
Why does my clay ball have creases or a seam?
Creases come from folds that were rolled in rather than pressed out, or from clay that is not conditioned enough. Squeeze the lump smooth with your fingertips before rolling, and finish with a few very light circles between your palms.
How do I make several shapes exactly the same size?
Measure the clay before shaping. Roll an even log, cut it into equal lengths with a tissue blade, and form each length into a ball. Starting from equal amounts is far more reliable than judging finished shapes by eye.
How do I roll a sheet to an even thickness without a pasta machine?
Place a depth guide on each side of the clay, such as two matching stacks of playing cards, and rest the ends of the acrylic roller on them as you roll. The guides stop the roller at the same height across the whole sheet.


