Simple Polymer Clay Canes: Bullseye, Stripe, and Spiral
Three beginner canes teach the three core moves of caning: wrapping a log, stacking sheets and rolling a spiral. Build each one large, reduce it, and slice clean patterned pieces.
Tutorial at a glance
Materials
- Polymer clay in two or three contrasting colors
- Acrylic roller
- Tissue blade
- Ceramic tile or other smooth work surface
- Baking parchment or plain paper for storing leftover cane
A cane is a log of clay with a pattern running through its whole length, so that every slice cut from it shows the same design. Simple polymer clay canes are built large, where the pieces are easy to handle, then squeezed and rolled thinner until the pattern is as small as you want it. The pattern shrinks with the cane and keeps its proportions.
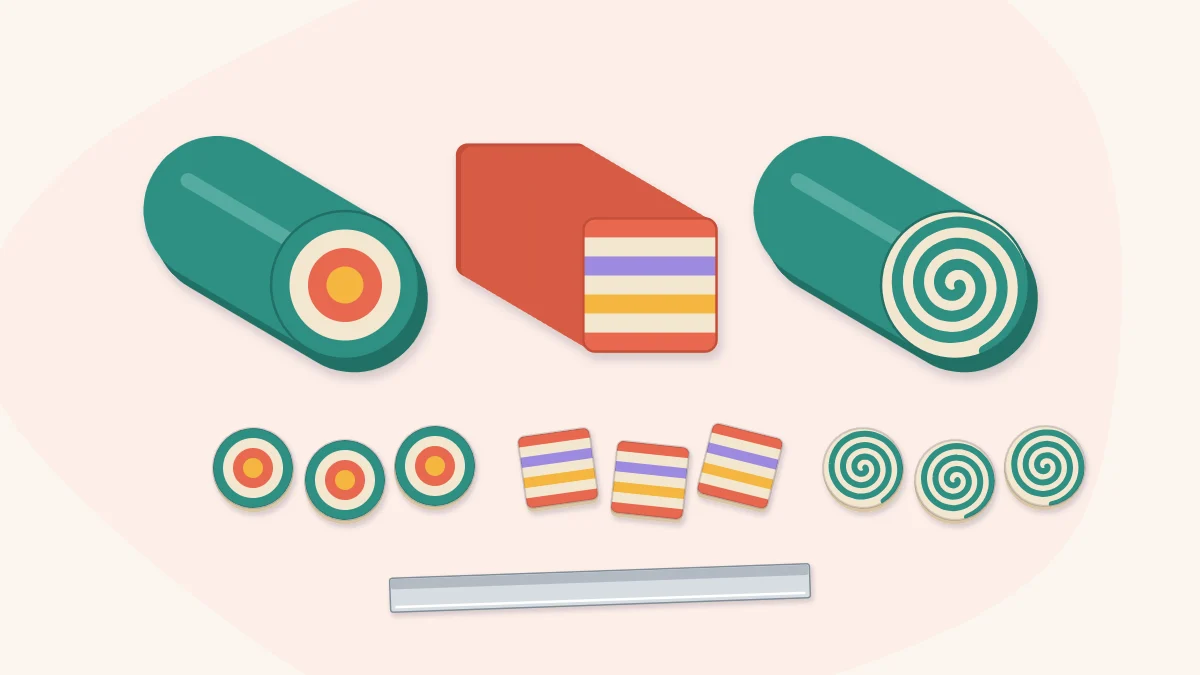
Three canes cover the core skills: the bullseye teaches wrapping, the stripe teaches stacking, and the spiral teaches rolling.
Start with all your clay at the same softness. If one color is softer than the other, it will squeeze out faster during reduction and the pattern will distort. Bring each color to the same feel, as described in how to condition polymer clay.
What you need
- Two or three colors of polymer clay with strong contrast between them
- Acrylic roller
- Tissue blade, as sharp as you have
- A ceramic tile or other smooth work surface
Contrast matters more than the particular colors. Two mid-tones that look different as blocks can merge into a blur once the pattern is small, so pair a light with a dark. If you are blending your own shades, the guide to color mixing shows how to make a light and a dark version of one color.
The three canes at a glance
| Cane | Built from | Pattern on the slice | Main thing to get right |
|---|---|---|---|
| Bullseye | A log wrapped in one or more sheets | Concentric rings | A seam that meets edge to edge with no overlap |
| Stripe | Flat sheets stacked in alternating colors | Parallel bands | Sheets of equal thickness and no trapped air |
| Spiral | Two stacked sheets rolled up together | A two-color swirl | A tight first turn with no gap in the center |
Build and reduce a bullseye cane
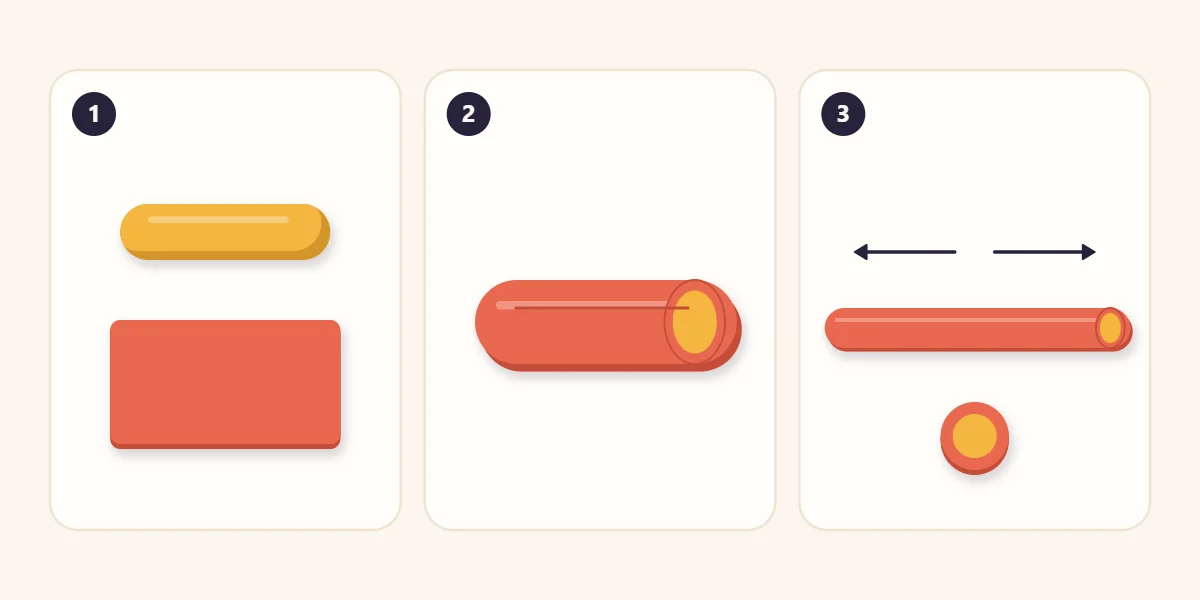
- Roll the core. Shape one color into a smooth, even log about 1 inch (2.5 cm) across and 2 inches (5 cm) long. Trim both ends flat with the blade.
- Roll the wrap. Roll the second color into a sheet about 1/8 inch (3 mm) thick, a little wider than the log is long. Cut one edge straight.
- Wrap once. Lay the log on the straight edge and roll it forward until the sheet has gone around once. Where the leading edge touches the sheet it leaves a faint line; roll back slightly and cut along that line.
- Close the seam. Bring the two cut edges together so they butt against each other, and smooth the join with a fingertip. An overlap makes a thick spot in the ring; a gap leaves a notch.
- Reduce. Squeeze the cane gently around its middle, turning it as you go, and work outward toward both ends. Then roll it on the work surface with flat fingers, moving your hands apart, until it is the diameter you want.
- Trim. Cut off both ends. They are always distorted, and the true pattern appears a short way in.
Rolling straight away with pressure from above moves the outer layer more than the core, so the wrap creeps past the ends and the middle ring ends up thin. For more rings, add another wrap in a third color before reducing.
Stack a stripe cane
- Roll two sheets. Roll each color to the same thickness, about 1/8 inch (3 mm), and trim each to a rectangle of the same size.
- Stack them. Lay one sheet on the other, lowering it from one edge to the other so air is pushed out instead of trapped.
- Cut and restack. Cut the stack in half across its length and place one half on top of the other, keeping the colors alternating. Repeat once more for eight layers.
- Square it up. Press the sides gently against the work surface or the flat of the blade to make a neat block.
- Reduce. Press down evenly along the top with the roller, flip the block and press again, lengthening it a little at a time. Keep it rectangular instead of rolling it round.
Each cut and restack doubles the number of stripes and halves their width. Slices from this cane give striped strips that can be laid edge to edge on a backing sheet, which is one of the methods used in striped slab patterns.
Roll a spiral cane
- Roll and stack two sheets. Roll two contrasting colors to the same thickness and stack them as for the stripe cane. Trim to a rectangle about 2 inches (5 cm) wide and 4 inches (10 cm) long.
- Taper one short edge. Press along one short edge with the roller, or cut it at a slant with the blade, so it thins to almost nothing. This edge becomes the center of the spiral.
- Start the roll. Fold the tapered edge over on itself as tightly as you can, with no hollow in the middle, then roll the stack up along its length, keeping the pressure even across the width.
- Finish the outer edge. Taper or trim the far edge as well, so the cane does not have a step on the outside, and roll the cane lightly to seal it.
- Reduce and trim as for the bullseye: squeeze from the middle outward, roll, and cut off the ends.
The color on the outside of the roll becomes the outline of the spiral, so decide which sheet goes underneath before you start.

Slice the cane cleanly
A freshly reduced cane is warm and soft, and slicing it right away squashes the pattern. Set it aside until it feels cool and firm.
Hold the tissue blade at both ends and press straight down in one motion, without sawing. Give the cane a quarter turn after each cut so that it does not flatten on one side. Wipe the blade when clay builds up on it, since residue drags one color across the next.
Watch out
A tissue blade is sharp along its whole length. Mark the blunt edge with a strip of tape or a dot of paint so you always pick it up the right way, and store it in a sleeve or its original packaging.
Use, cure and store
Thin slices can be pressed onto a plain sheet and rolled smooth to make a patterned veneer, or wrapped around a ball of scrap clay to make patterned beads; the shaping and piercing steps are in the tutorial on making polymer clay beads.
Cure (bake) anything made from cane slices according to the exact instructions supplied with your own clay. Requirements differ between manufacturers and product lines.
Tip
Wrap leftover uncured cane in baking parchment or plain paper and keep it somewhere cool and away from sunlight. Label it with the colors used so you can match it later.
Frequently asked questions
Why does my cane pattern distort when I reduce it?
The most common causes are colors of unequal softness and reducing by rolling only. Condition every color to the same feel, then squeeze the cane gently from the middle outward before rolling it. The ends always distort a little, so trim them off.
How do I slice a cane without squashing it?
Let the cane rest until it feels cool and firm, then press a sharp tissue blade straight down in one motion without sawing. Give the cane a quarter turn after each cut so one side does not flatten, and wipe the blade when clay builds up on it.
Which cane should a beginner make first?
The bullseye is the usual starting point because it has only two parts, a log and a wrap. It teaches how to close a seam and how to reduce, which are the skills the stripe and spiral canes also rely on.