How to Make a Polymer Clay Keychain
Build a chunky three-band arch from rolled logs, pierce the hole in the right place and attach it to a split key ring.
Tutorial at a glance
Materials
- Polymer clay in three colors
- Acrylic roller
- Tissue blade
- Needle tool
- Ceramic tile
- Sturdy jump ring, about 3/8 in (1 cm)
- Split key ring
- Two pairs of flat-nose pliers
- Fine wet-and-dry sandpaper
- Liquid polymer clay (optional)
Keys get dropped, sat on and rattled around in bags, so a polymer clay keychain has a harder life than almost anything else you will make. The design has to be chunky, the hole has to sit in the right place, and the clay has to be fully cured.
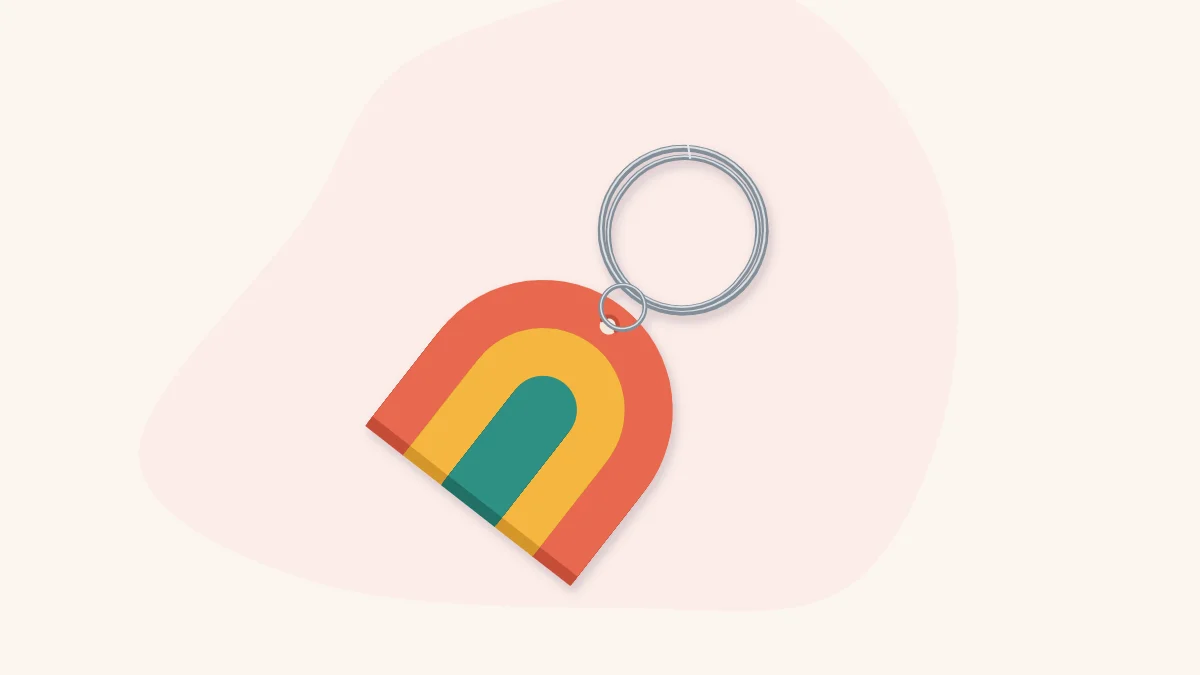
The charm in this tutorial is a thick rounded arch built from three nested bands of color, joined by a jump ring to a split key ring. It uses only rolled logs, so you do not need cutters.
What you need
- Polymer clay in three colors (coral, mustard and teal are used here)
- An acrylic roller and a tissue blade
- A needle tool
- A ceramic tile to build and cure on
- A sturdy jump ring, about 3/8 inch (1 cm) across
- A split key ring
- Two pairs of flat-nose pliers
- Fine wet-and-dry sandpaper
Choose a jump ring made from thick wire. The fine rings sold for earrings open up under the weight of a bunch of keys.
Design rules for a charm that lasts
A keychain charm is a small object under constant stress, so a few shape choices matter more than color or pattern.
| Feature | Works well | Likely to fail |
|---|---|---|
| Thickness | About 1/4 inch (0.6 cm) or a little more | Thin slabs that flex |
| Outline | Rounded, compact shapes | Long thin points, narrow necks |
| Decoration | Flat, inlaid or pressed in | Raised parts stuck on top |
| Hole position | A full hole-width or more from the edge | Right at the rim |
| Size | About 1.5 to 2 inches (4 to 5 cm) | Large, heavy pieces that swing |
The nested arch suits all of these. Its bands are fused side by side rather than layered on top, so nothing sits proud of the surface to catch and snap off.
Build the layered arch
- Condition the clay. Work each color until it is soft and bends without cracking. Stiff clay does not fuse well where the bands meet, and those seams become weak lines later.
- Roll three logs. Make each one about 1/4 inch (0.6 cm) thick and keep the thickness even from end to end.
- Form the inner band. Bend the teal log into a tight upside-down U on the tile.
- Add the middle and outer bands. Wrap the mustard log snugly around the teal one, then the coral log around the mustard. Press each band gently against the one inside it so no gaps show.
- Trim the feet. Use the tissue blade to cut straight across the bottom so all six ends finish in one level line.
- Fuse the bands. Lay a sheet of plain paper over the arch and roll over it once with light pressure. Then turn the piece over and smooth the back seams with a fingertip.
Hold the arch up and look at it side-on. If you can see daylight between any two bands, press them together again. A visible gap now becomes a crack later. If you would rather cut a solid shape from a decorated sheet instead, the guide to slab patterns such as terrazzo and stripes gives you flat designs that hold up well, and the offcuts are enough for a set of polymer clay magnets.
Tip
For a stronger join, brush a very thin smear of liquid polymer clay between the bands before pressing them together. Check the product label for how it should be cured alongside your clay.
Make the hole in the right place
Pierce the hole before curing.
- Mark the spot. Touch the needle tool to the top center of the outer band, leaving at least a full hole-width of clay between the hole and the outer edge.
- Pierce from the front. Push the needle straight down while rotating it between your fingers. Twisting drills through the clay; pushing without twisting drags it and distorts the arch.
- Pierce from the back. Turn the piece over and go through again from the other side. This cleans up the raised lip the needle leaves where it exits.
- Widen it. Circle the needle gently until the hole is a little larger than the wire of your jump ring. The ring must swing freely. A tight hole lets the ring lever against the clay every time the keys move.
The thin bridge of clay above the hole carries the whole load, so be generous.
Cure the charm
Cure (bake) the arch on its tile, following the instructions on the package of your clay to the letter. Requirements vary by manufacturer and product line, and a thick piece like this one needs whatever the wrapper says for its thickness.
Use a separate oven thermometer, since oven dials can be inaccurate, and tent the tile loosely with foil. Under-cured clay tends to be brittle, which matters more for a keychain than for a piece that sits on a shelf. Let the charm cool completely before you handle it. The full setup is described in the guide on how to cure polymer clay.
Sand and attach the hardware
Once cool, wet-sand the edges and the back lightly to take off any sharp corners. Rinse, dry and check the hole is clear.
- Open the jump ring. Grip it with a pair of pliers on each side of the split and twist one hand toward you and the other away. Never pull the ends apart sideways into a wider C, because the ring will not close round again.
- Thread the charm. Pass the open ring through the hole in the arch.
- Add the key ring. Hook the split key ring onto the same jump ring.
- Close it. Twist the ends back until they meet flush. Run a fingernail over the join; if it catches, the gap is big enough for the key ring to work its way out.
The guide to jump rings and other findings shows the twisting motion in more detail. Findings metals vary, so check what yours are made of if metal sensitivity is a concern.

If something goes wrong
- The charm broke at the hole: the hole was too near the edge or too tight for the ring. Leave more clay above it and widen it next time.
- The bands separated: they were not pressed together firmly enough before curing. Fuse them under paper with the roller.
- The arch snapped across the middle: it was rolled too thin or under-cured. Make thicker logs and recheck the package instructions with an oven thermometer.
- The jump ring keeps opening: the wire is too fine. Swap it for a heavier ring, or use a small split ring in its place.
Watch out
A varnish is not a protective shell. Coatings can scratch and wear against keys, and products vary, so check the label and test on a cured scrap. A well-sanded bare surface often ages better on a keychain.
Frequently asked questions
How thick should a polymer clay keychain be?
About 1/4 inch (0.6 cm) or slightly more is a sensible starting point for a charm around 2 inches (5 cm) wide. Thin slabs flex in a pocket or bag, and repeated flexing leads to cracks. Compact, rounded shapes hold up better than long thin ones.
Where should the hole go on a clay keychain?
Place it at the top center with at least a full hole-width of clay between the hole and the edge. That bridge of clay carries the whole load, so a hole right at the rim is the most common cause of breakage. Make the hole slightly larger than the jump ring wire so the ring swings freely.
Should I make the hole before or after curing?
Before curing is easiest. A needle tool twisted through soft clay leaves a clean hole with no special equipment, and piercing again from the back tidies the exit side. Check after curing that the jump ring passes through freely.